You can be up and running with Flexi Sections in 3-4 minutes.
After having installed the application you basically only need to do 2 things.
- Add Flexi Sections to you Page Template
- Create your first condition/content.
But let’s take it from the top. And do reach out to us on chat or support@flexisections.com if you have any questions.
Download and Install the Flexi Sections Application #
To get started you need the application. If you haven’t already you should download from the Shopify App Store.
While installing the application you will need to grant access to your theme, products and collections. Otherwise it won’t be possible to apply our secret sauce.
After installation 2 major actions need to be taken.
Add Flexi Sections to your template #
In order to show content on your Product Pages, you need to edit your Product Page Templates in Online Store > Themes > Customize.
- Find your Product Template(s) from the top navigation.
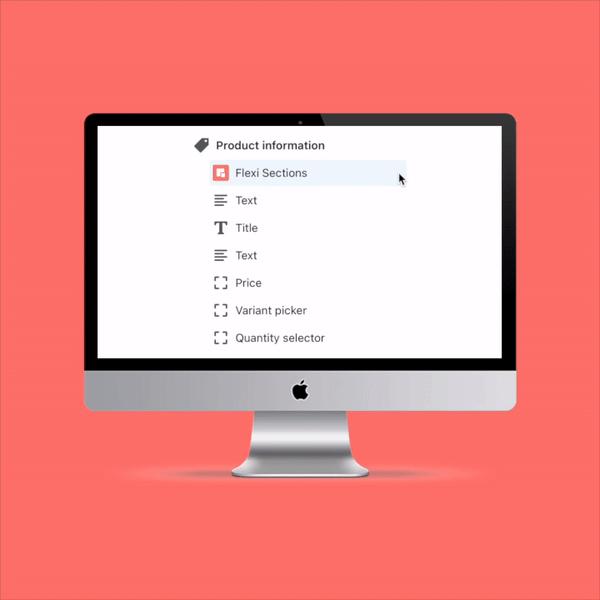
- You can add one or multiple “Flexi Sections” to your theme.
All done by pressing “Add block“ in the left column. - In “APPS” you choose the Flexi Sections application.
- Give the section a “handle” to identify the location. Eg. below-button, main or above-footer. This “handle” is later used as a reference when you create your content.
Create your first piece of content #
In order to show content – content needs to be created.
- Select “Create Content” from the Flexi Sections Dashboard.
Name it and give it a description for future reference.
Create your first content section. Name your content and give it a description. And importantly. Apply the “handle” which is the reference to where you want to show your content on the product page template.

2. Apply your condition(s) on what products the content should show on. You have multiple conditions to play around with:
- Product title
- Product description
- Vendor
- Collections
- Tags
- Color
- Price
- Inventory level
- Date and time
And we are continuously adding more and more types of conditions to apply.

3. Lastly, select the content format you want to show when the conditions apply and fill in the blanks.

That’s it! It really is that easy….
Got questions? Chat us up, check out our knowledgebase or drop us an email on hello@flexisections.com.